BOW Pull-up & Dip Station
From 2060,00 €
Including shipping & taxes
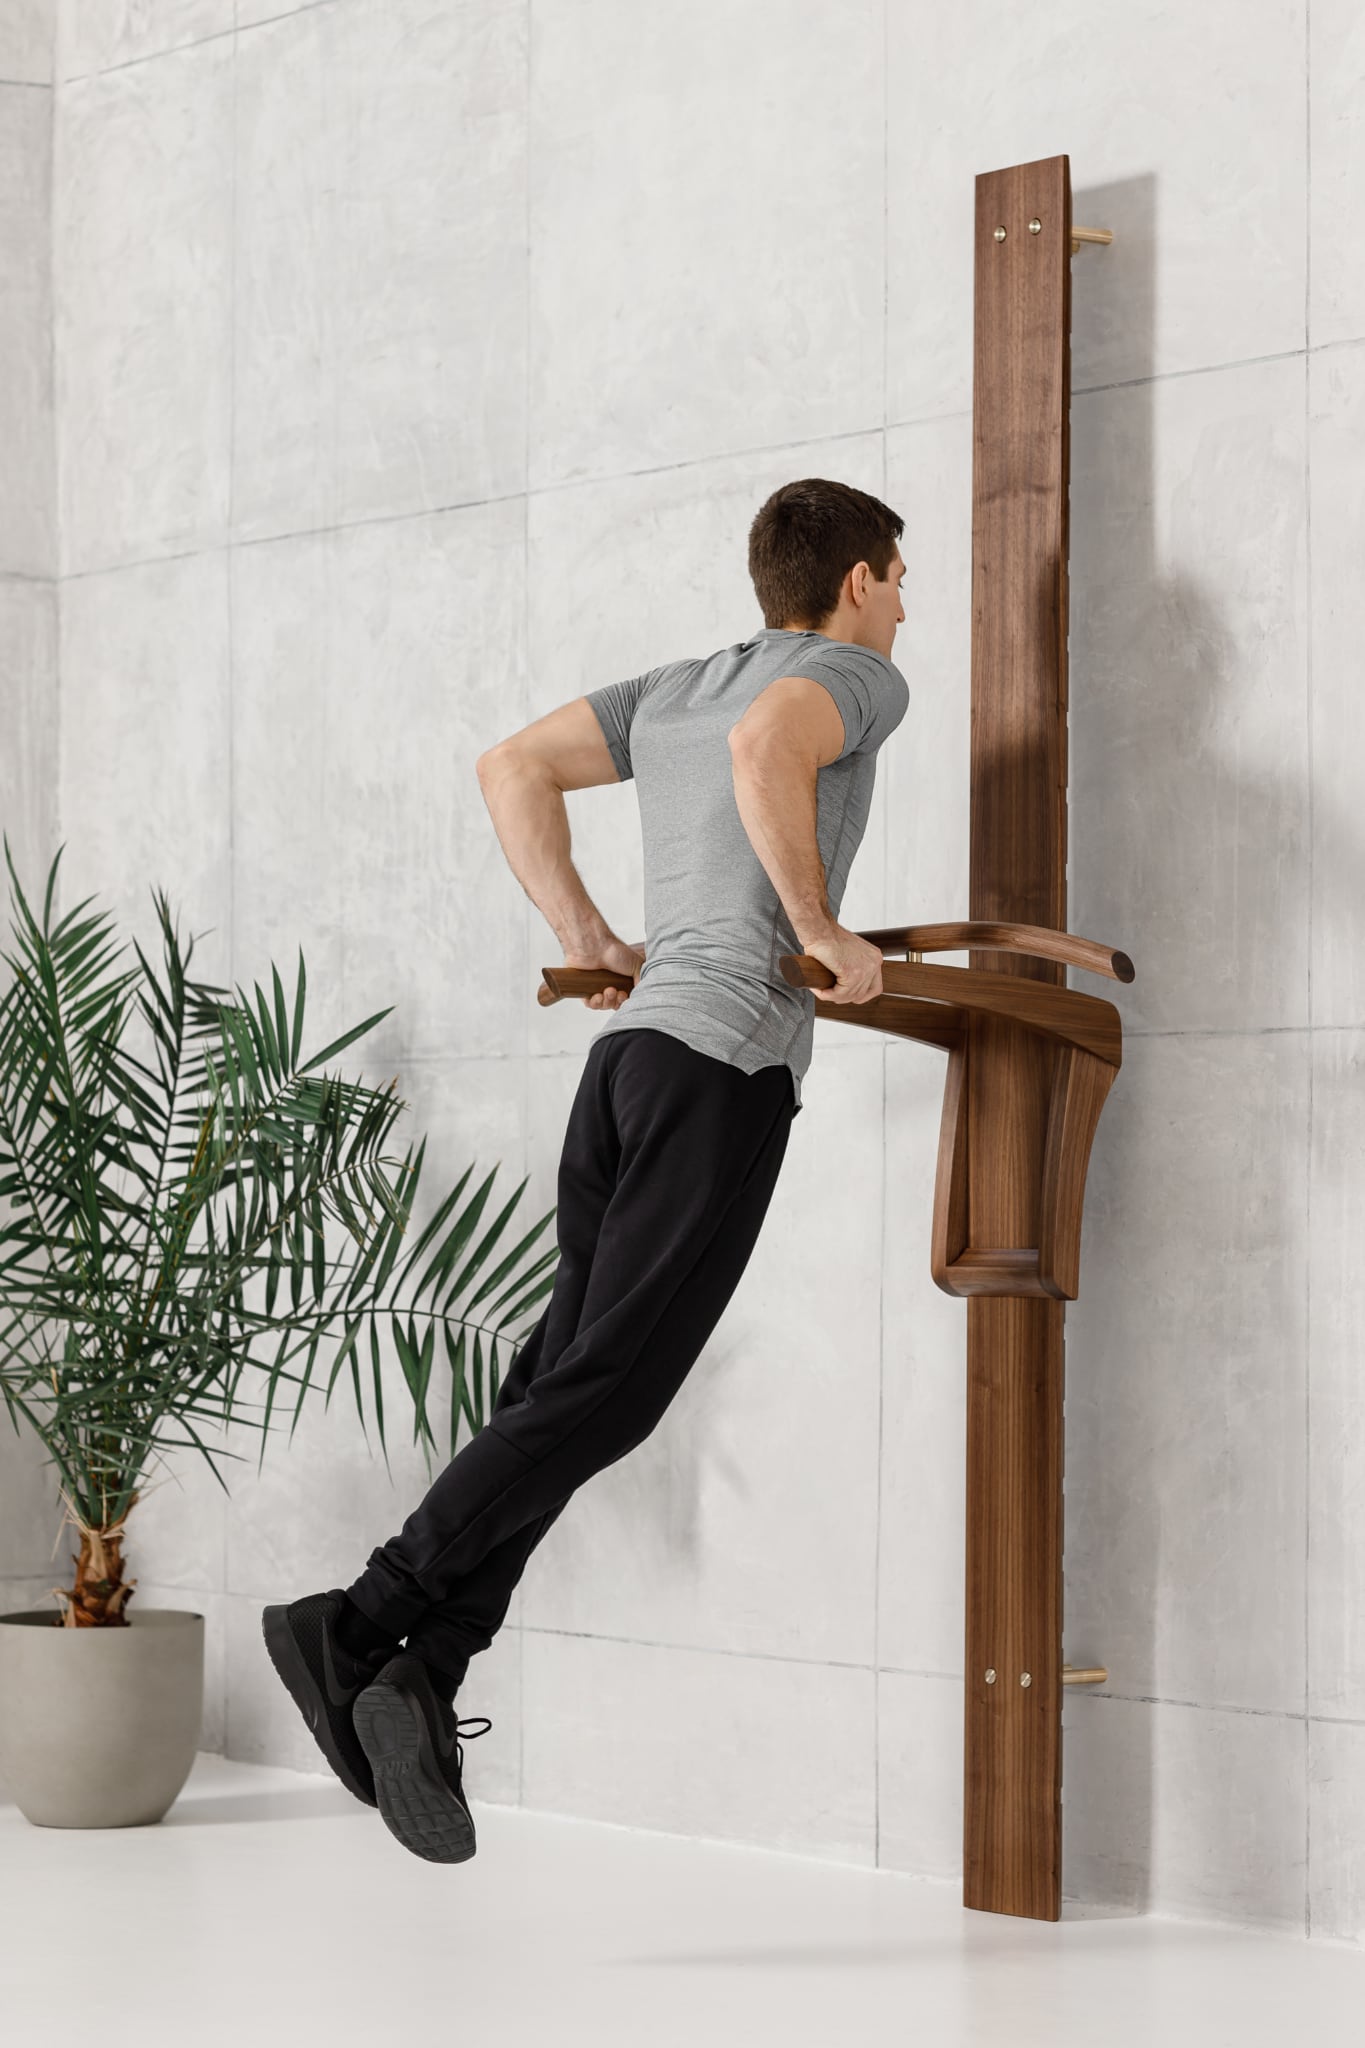
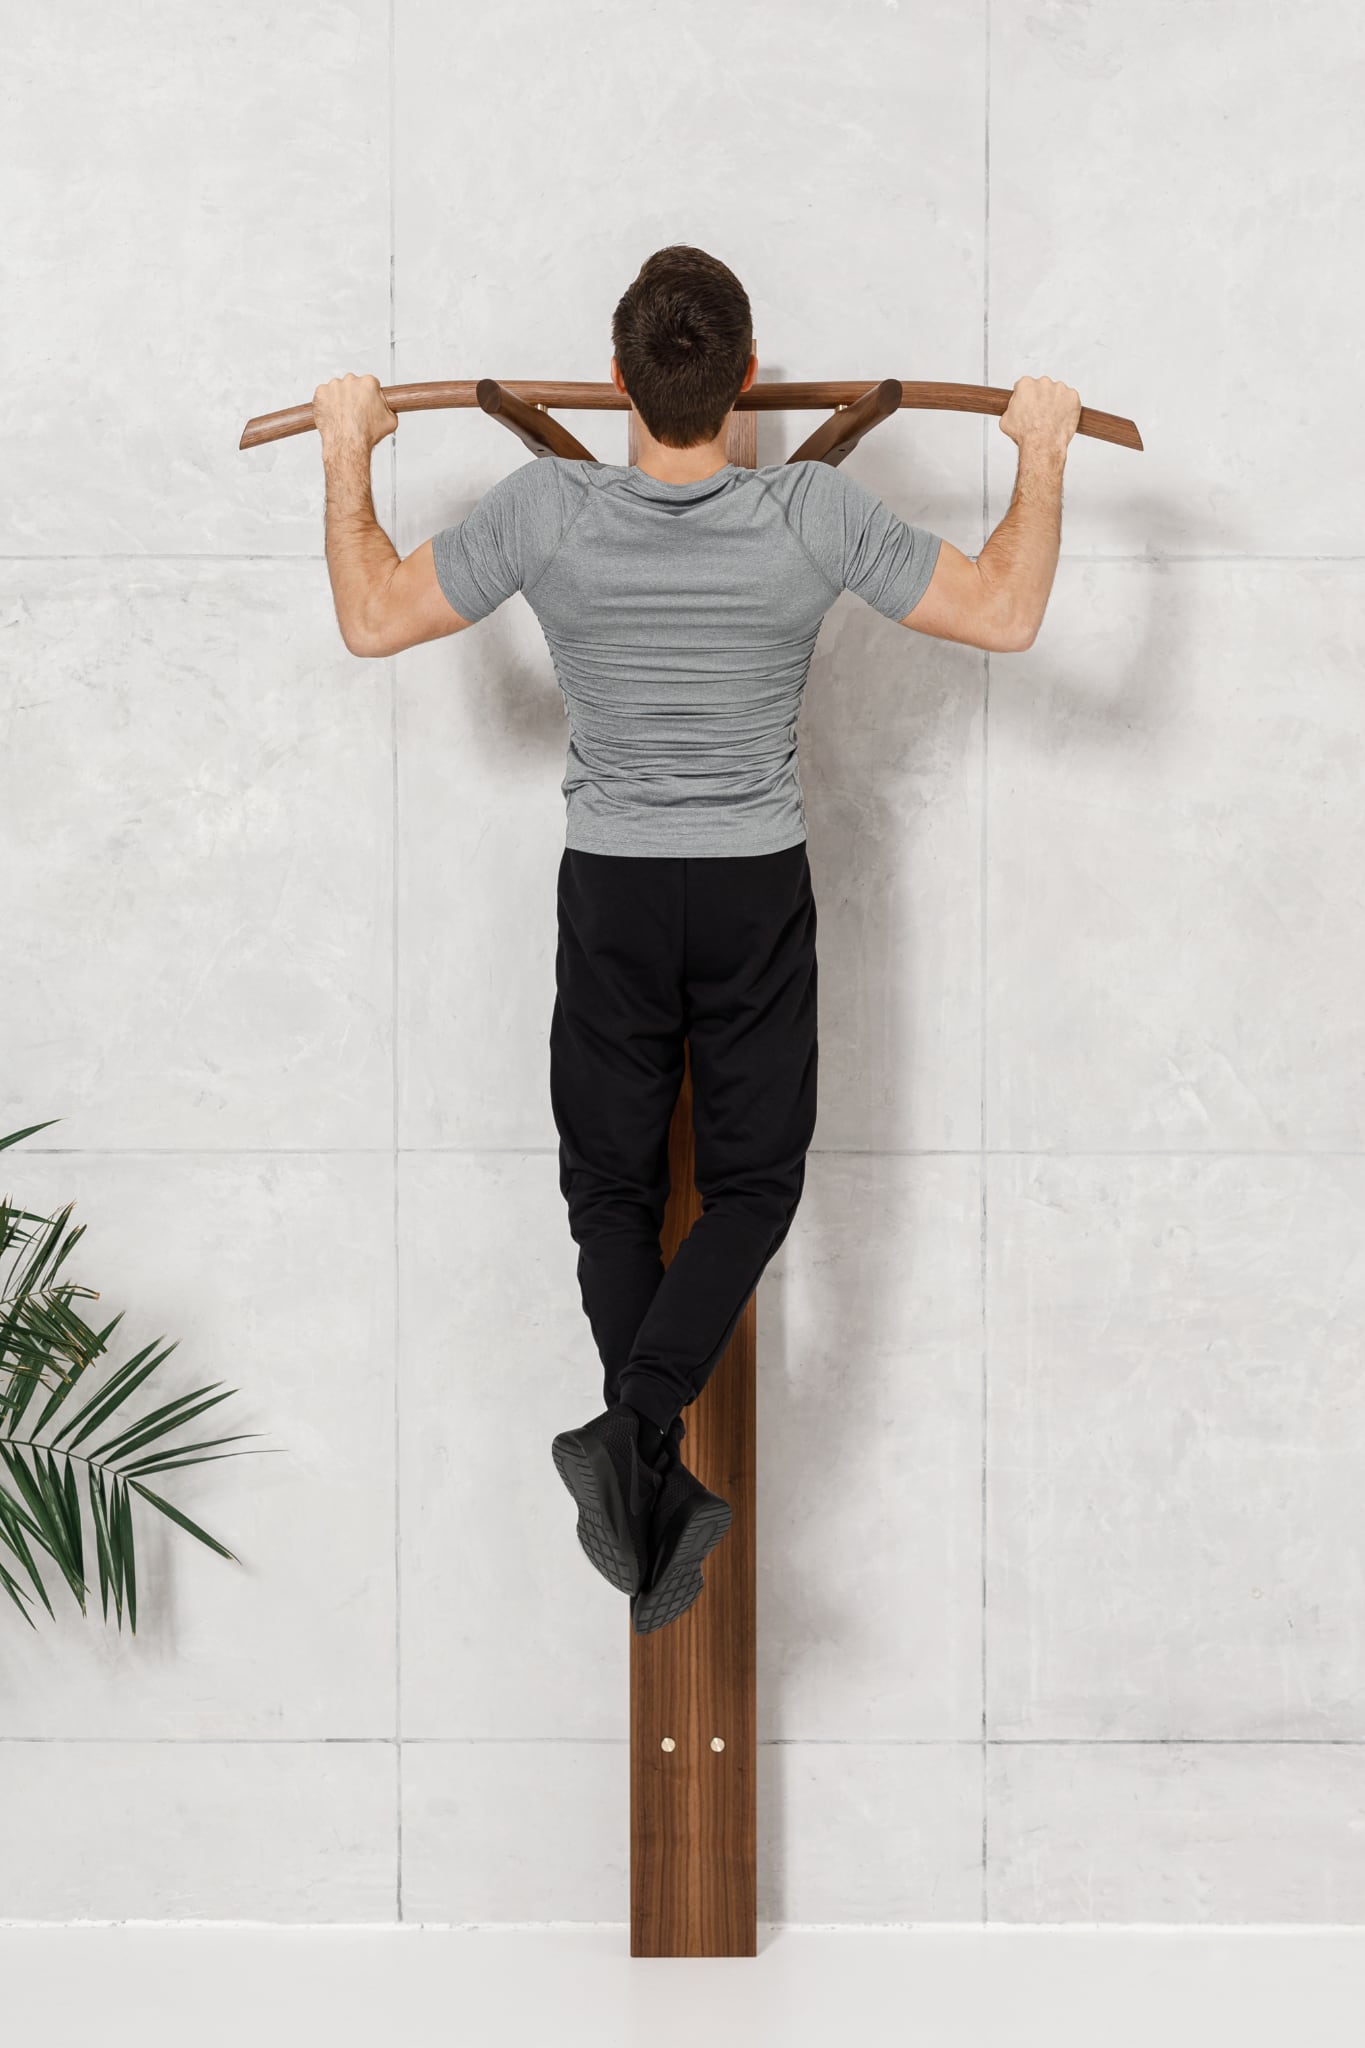
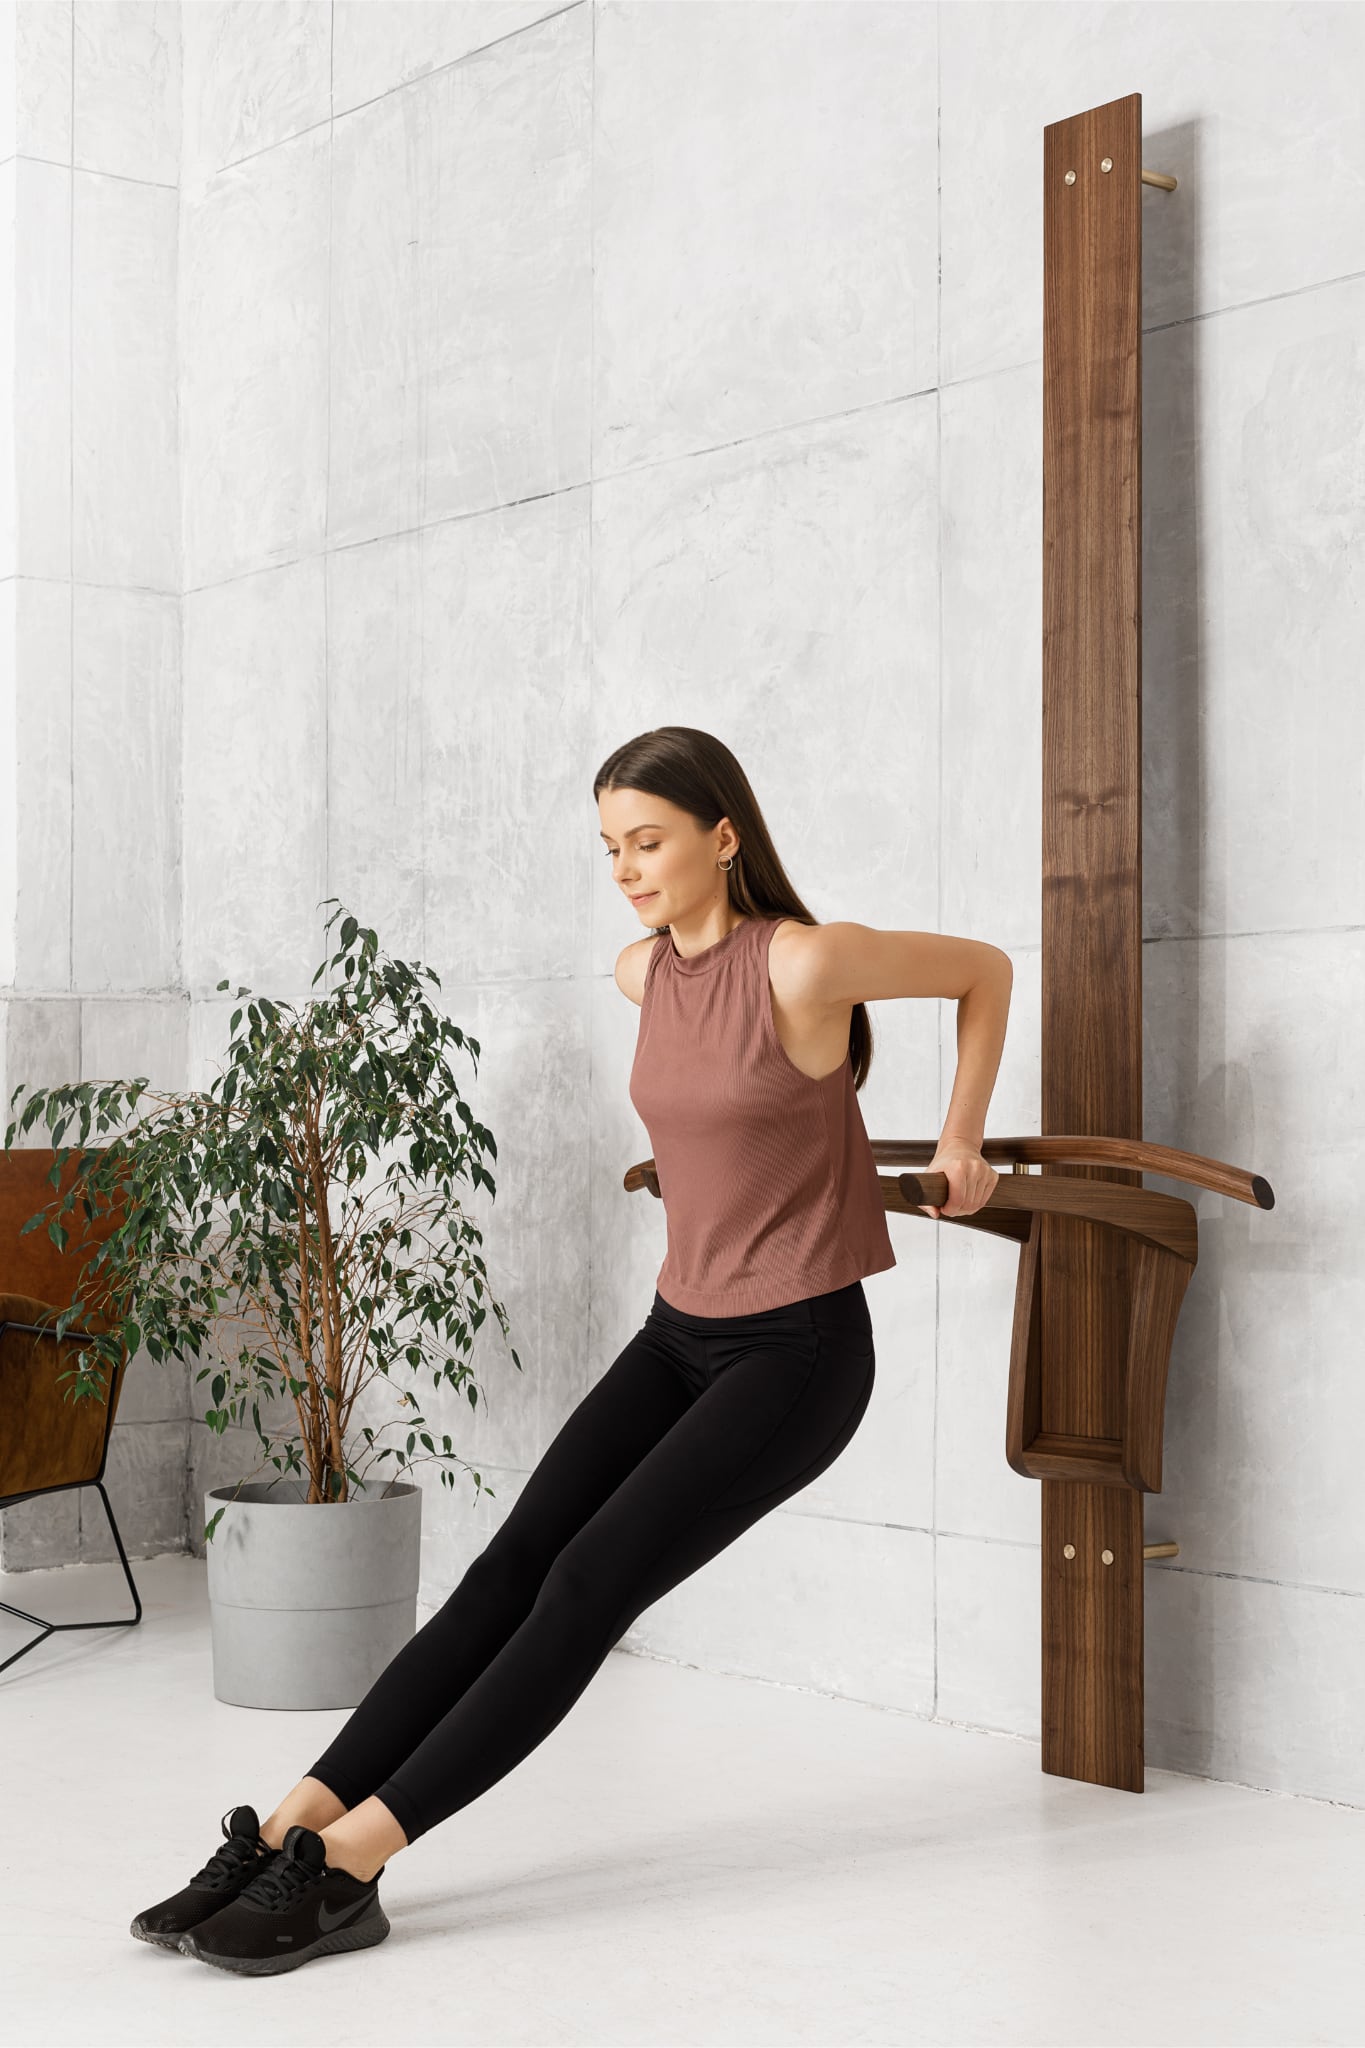
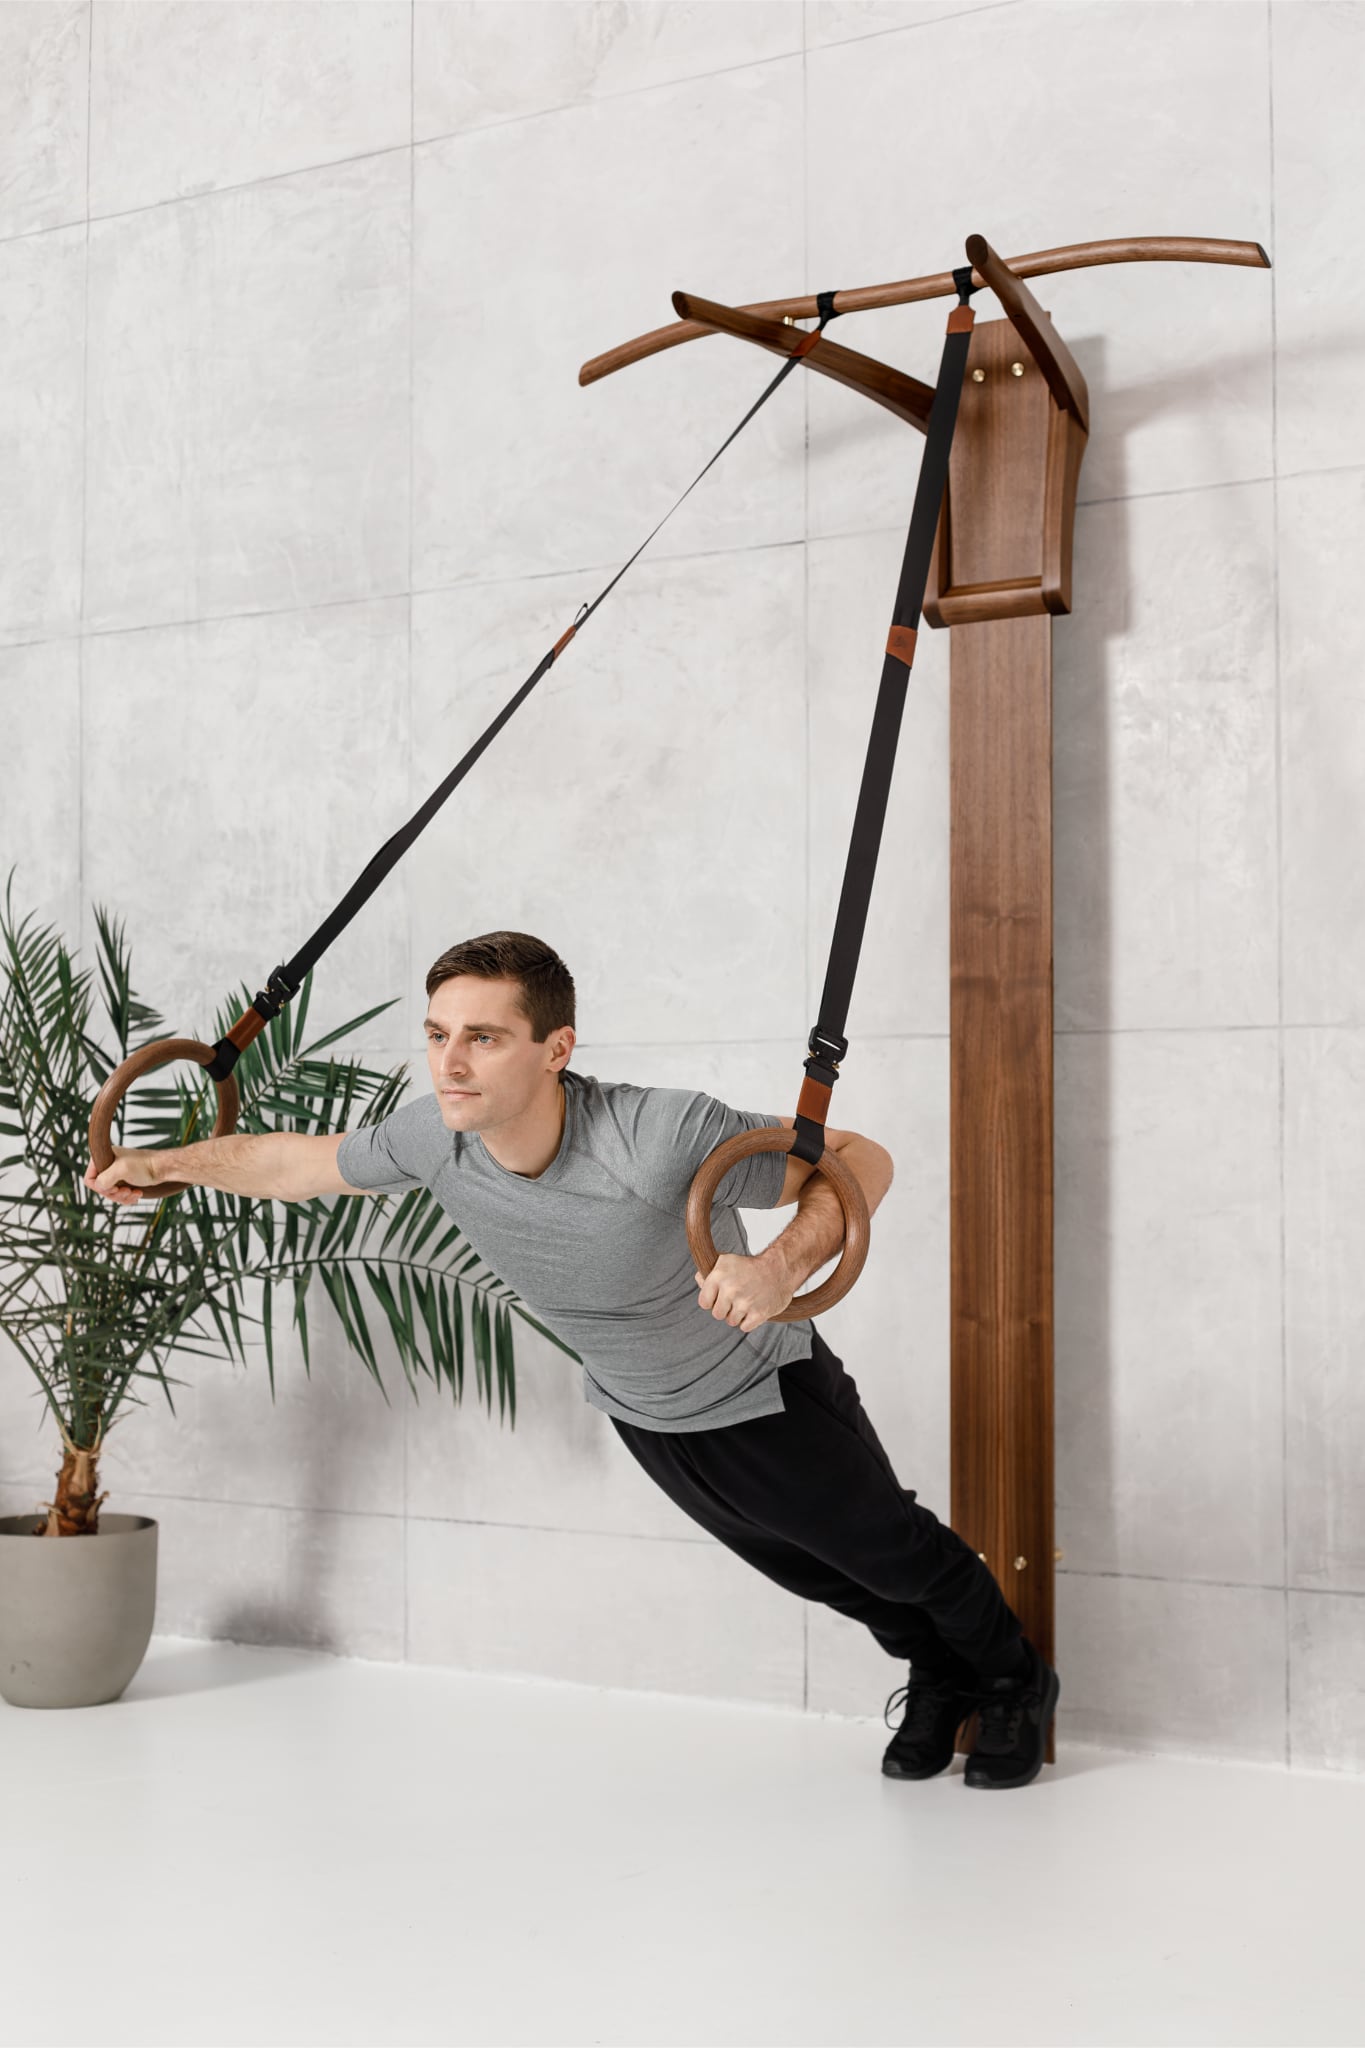
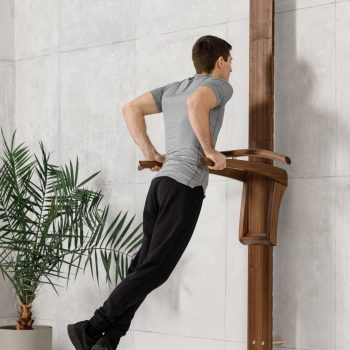
Inspired by a classic power tower, the BOW Pull-Up & Dip Station merges the utility of home gym equipment with aesthetic sophistication. With a pull up bar and dip bars integrated into an adjustable height bracket, this innovative piece is in a category of its own.
Every detail – from the thoughtful design down to the brushed metal elements that discreetly conceal installation screws – speaks of its long-lasting quality and our commitment to sustainability. The wide, ergonomically designed pull up bar supports various grip techniques, while the subtly angled dip bars cater to individuals across a spectrum of body types. Changing the bar height is straightforward, and a handy safety pin ensures safety during your workout. Handmade in our workshop using premium hardwoods, this Pull Up & Dip Station is as sturdy as it is elegant.
– Compatible with solid and timber frame walls
– Traditional wood joinery for added strength
– Effortless height adjustment
– Ergonomically shaped pull up bar
– Brushed metal plugs for concealed installation
– Metal pin to lock the bars in place
Package Contents
- Main board × 1
- Dip bars × 1
- Pull-up bar × 1
- Wall mounting assemblies × 2
- Wall plate covers × 2
- Metal plugs with rubber rings × 4
- Metal safety pin × 1
- Smaller wood screws for pull-up bar × 2
- Larger wood screws for timber frame walls × 4
- Expansion fasteners for solid walls × 4
- Screwdriver bits
Tip: Only insert the metal plugs with rubber rings after the installation is complete – they fit tightly and may be tricky to remove once in place.
Before You Begin
Please read this section carefully before starting installation.
- This product is designed for indoor use only and must be mounted to is structurally sound and load-bearing wall.
- Installation conditions vary widely between countries, building types, and wall constructions, and we cannot predict all scenarios.
- The installer is fully responsible for ensuring the product is securely and safely installed. Professional assessment and installation may be required.
- It is critical to assess site conditions thoroughly and select appropriate installation hardware – this may differ from the standard hardware supplied with the product.
- Installation steps may also need to be adjusted depending on your specific conditions and may differ from those outlined in this manual.
- Before drilling, check for electrical wiring, plumbing, or other utilities inside the wall. Use a cable/pipe detector if needed.
- Only use power tools and hardware in good condition and follow manufacturer safety instructions.
Improper installation can result in product failure, property damage, serious injury, or death.
Installation of Main Board
- Attach wall mounting assemblies to the main board
Remove the bolts protruding from each assembly. Position the assemblies on the corresponding spots on the back of the board. From the front side, insert the bolts with washers and fasten them lightly (they will need to be removed later). Centering the bolts in the holes will allow for some installation tolerance.
- Mark mounting points
After selecting a suitable installation location, place the main board against the wall so that both mounting plates are in full contact with the wall and the base of the board rests flush on the floor. Carefully mark the hole locations on the wall through the mounting plates. If mounting to a timber frame wall, ensure the plates are centered on the wall stud.
- Detach for wall preparation
Remove the main board from the wall and detach the wall mounting assemblies from the board.
- If installing on a solid wall
Drill four 10 mm (0.4″) holes, each 90 mm (3.5″) deep, precisely at the marked positions. Vacuum out any dust from the holes. Use the expansion fasteners for solid walls to securely fix both wall mounting assemblies to the wall.
- If installing on a timber frame wall
Drill four 5.5 mm (0.22″) pilot holes, each 65 mm (2.5″) deep, directly into the stud at the marked locations. Use the larger wood screws to securely fix both wall mounting assemblies to the wall.
- Attach dip bars to main board
Place the dip bars onto the main board and insert the metal safety pin to hold them in place.
- Mount main board to wall
With the dip bars attached, place the main board onto the wall mounting assemblies. Insert the bolts with washers from the front and tighten them firmly. Ensure the board is secure and has no play.
- Conceal fasteners
Insert the metal plugs with rubber rings to cover the bolts.
Installation of Pull-up Bar
- Position the bar
With the holes facing downward, place the pull-up bar onto the metal supports on top of the dip bars. You may need to adjust the dip bars slightly inward or outward for the round slots to align with the supports.
- Secure the bar
While holding the pull-up bar in place, drive the smaller wood screws upward from underneath the dip bars until the pull-up bar is tightly fastened and does not move.
Changing Height of Bars
- Remove the safety pin.
- Tilt the bar assembly slightly to disengage the metal bar from the horizontal slot in the main board.
- Carefully move the assembly to the desired height.
- Tilt the assembly back so that the metal bar drops into a new horizontal slot.
- Reinsert the safety pin into the appropriate hole at the back of the main board to prevent the metal bar from slipping out of the slot.
Warning! Always ensure either the safety pin is engaged or the bar assembly is securely held. Failure to do so may result in the bar unit falling, causing product damage, property damage, injury, or death.
Safe Use Guidelines
- Always use common sense and be aware of your personal limits while training.
- Consult your doctor if you have any medical conditions, and stop exercising if you feel unwell.
- Learn and practice proper exercise technique before using the equipment.
- Ensure the equipment is properly installed, safe to use, and undamaged before each use.
- Do not modify or attempt to repair the equipment yourself.
- Do not allow others to use the equipment unless they are capable and responsible.
- If others use the equipment, inform them of all potential risks and ensure proper supervision.
- This equipment is designed for use by one person at a time with a maximum user weight of 120 kg (265 lbs).
- Never allow children under 36 months to use this equipment.
- Children must be under the constant supervision of a competent adult when near or using this equipment.
Warning! Fitness training is a potentially dangerous activity that can result in injury or death. You assume full responsibility for any damage, injury, or death resulting from improper installation or use of this equipment.
 BOW Pull-up & Dip Station